IMPORTANT NOTES:
- Not all features are available on every Enterprise platform.
- Back up your CRM data before syncing with Snappy Kraken. Data loss may occur depending on how your data is organized.
- Snappy Kraken does not delete contact information. Instead, move contacts to an inactive group in your CRM to ensure they are properly removed from Snappy Kraken groups.
I. Connecting Salesforce:
Start by clicking the Integrations icon
 on the left-side menu.
On the Integrations page, click the "+ Connect" button in the Salesforce box.

If you’re not logged into Salesforce, you’ll be redirected to a login screen. Enter your Salesforce username and password.
Click Log in to Salesforce to proceed.
Once your account is connected, you’ll receive a confirmation message in the Details page.
Now that your Salesforce account is linked, you have a few options for syncing or importing contacts between your Salesforce campaigns and Snappy Kraken groups.
Please note that Snappy Kraken groups are equivalent to Salesforce Campaigns. In this article, any mention of “groups” in the context of Salesforce refers to these campaigns. Furthermore, Salesforce Campaigns need to be active for it to be visible for syncing to the Snappy Kraken integration.II. Sync Options:
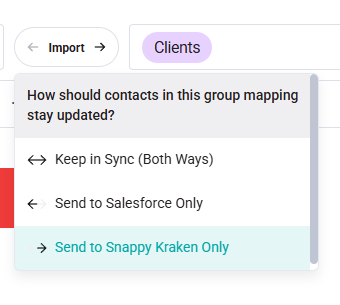
Keep in Sync Both Ways (Both Ways)
This feature enables two-way syncing of your contacts between Snappy Kraken and Salesforce. Any updates or new contacts in Snappy Kraken will reflect in Salesforce, and vice versa. If a group in Snappy Kraken is synced and doesn’t exist as a campaign in Salesforce, Snappy Kraken will create a campaign with the same name.
Send to Salesforce Only (Export)
This option imports and updates contacts in Salesforce based on any changes made in Snappy Kraken.
Import
This option imports and updates contacts in Snappy Kraken based on any changes made in Salesforce. If a Salesforce campaign doesn’t exist in Snappy Kraken, a new group will be created automatically, and contacts will be updated with the latest information from Salesforce.
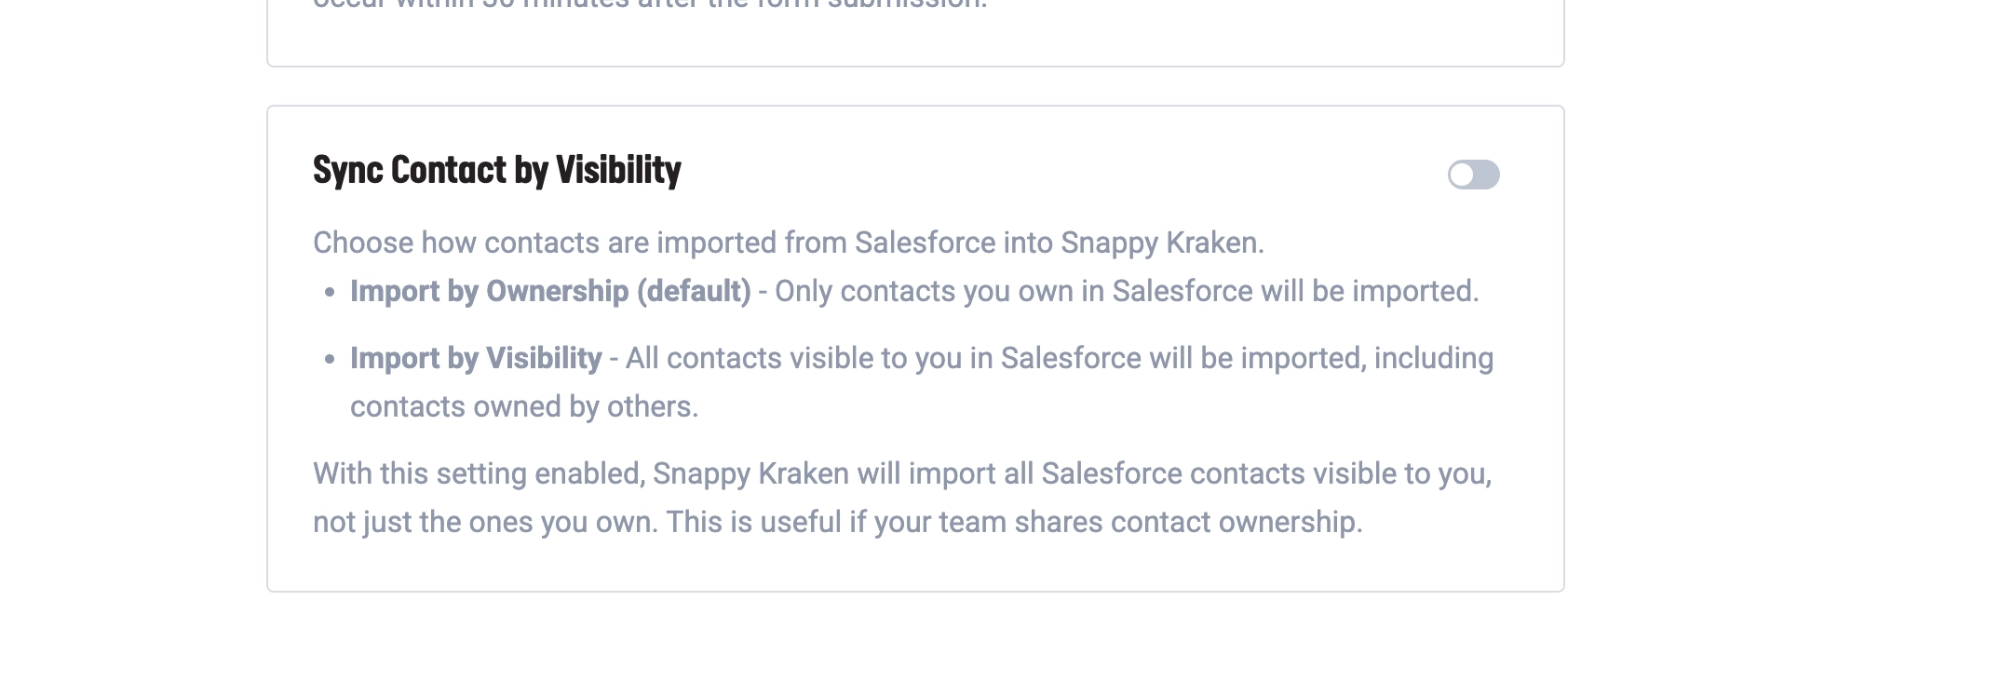
IIa. Sync by Visibility
For Salesforce and Salesforce-based integrations (e.g., Practifi, Salentica), only contacts owned by the user who is signed in to Snappy Kraken are synced by default. Enabling Sync by Visibility expands this to include all contacts visible to the signed-in user, regardless of ownership.
To enable Sync by Visibility:
- Navigate to the Details page.
- Scroll down to the Sync by Visibility section and toggle it on.
Important Notes:
- This feature is not available on all custom platforms. If you don't see this option, please contact Support.
- Marketing Admins cannot toggle this setting and retain read-only privileges.
III. Configure Automated Sync:
To import contacts from your Salesforce campaigns into Snappy Kraken, follow these steps:
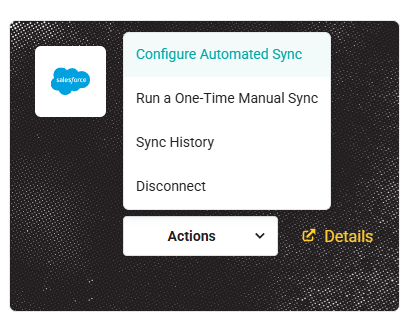
- Go to Active Integrations, then Salesforce Account > Actions > Configure Automated Sync.
- For each group in Salesforce or Snappy Kraken, select your preferred sync option.
- Under the Salesforce column, click the dropdown to choose the group you'd like to sync.
- Under the Snappy Kraken column, choose the group you want to import or sync to.
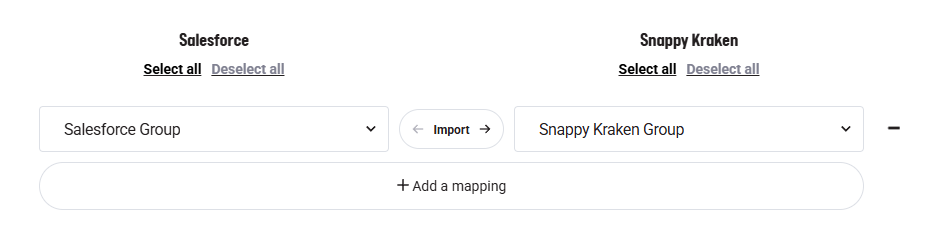
- Select whether you'd like to import, export, or sync the contacts between the chosen groups.
- Click the "+Add Mapping" button to select more groups.
- Click Continue.

- Agree to the terms (if applicable) by clicking "Finalize Sync".
 The syncing will run in the background. Once the import is complete, you’ll receive a notification within the app, even if you’ve left the import screen.
- Go to Active Integrations, then Salesforce Account > Actions > Configure Automated Sync.
IV. Run a One-Time Manual Sync
Manual syncs trigger the update of contacts based on the selected sync options at the time it's selected. If you’ve updated contacts, added new contacts, or created new groups in Snappy Kraken and want these changes reflected one-time in Salesforce, follow these steps:
- Go to Active Integrations, then Salesforce Account > Actions > Run a One-Time Manual Sync.
 For each group in Salesforce or Snappy Kraken, select your preferred sync option.
- Under the Salesforce column, click the dropdown to choose the group you'd like to sync.
- Under the Snappy Kraken column, choose the group you want to import or sync to.
- Select whether you'd like to import, export, or sync the contacts between the chosen groups.
- Click the "+Add Mapping" button to select more groups.
- Click Continue and agree to the terms (if applicable) by clicking "Finalize Sync".
- The syncing will run in the background. Once the import is complete, you’ll receive a notification within the app, even if you’ve left the import screen.
For further assistance, you can refer to additional articles from Salesforce or feel free to contact us—we’re here to help!